Getting Started
Getting Started Checklist
A Guide to Creating Your First Order
shopVOX Overview
Icons and Interface Tour
How Do I Cancel My shopVOX Account?
How do I Update Our Billing Info?
Color Picker - Saving Colors
Enhancing Security with Multi-Factor Authentication in shopVOX
Webinars in shopVOX Express: Learn and Grow with Us
Syncing Job Line item names, on the Jobs Board
Setting Up Your Account
Accounting
Connecting to your Accounting Software
Connecting Your QuickBooks Online account to shopVOX
Connecting your XERO account to shopVOX
XERO accounting FAQs
Connecting Your Sage One Account to shopVOX
In application credits and refunds - shopVOX Pay - Express
shopVOX Pay - Program Fees for shopVOX Express
Quickbooks Online: Common Sync Errors
Importing Your Customers and Contacts
Add your Payment Gateway
Inviting Users to Your Team
Add Your Logo and Company Info
Group and Describe Jobs with Tags
Setting Roles for your Team
SMTP Settings
Configuring Your Notifications
Created Canned Message Templates for Your Team to Use
Adding Vendors
How to Activate Your PAX A920 Pro Terminal
shopVOX Pay
Connecting External Gateways
Add your Payment Gateway (duplicate)
Quoting and Order Management
Adding/Updating Customers and Contacts
How to Issue Refunds and Credit Memos (non shopVOX Pay Process) shopVOX Express
Stay Organized with Notes, Tasks, and Assets
Purchasing and Receiving Blank Garments
Creating Your Own Custom Views
Roll Up Line Items to Combine Pricing
Invoice statements: creating and sending to a customer
Give customer options using No total Pdf
Production Management
Track Progress with Job Statuses
Managing Job Statuses and Deadlines
Creating Jobs for Tracking Production
Using a TV for your Job Board
Creating Your Own Custom Job Views
Uploading and Sending Proofs for Approval
Products and Pricing
Golden Products - Express
Apparel Decoration
How to Price Graphic Design (for apparel decorators)
How to price Embroidery
How to Price Screen Printing
How to Price Promotional Products
How to Price Color Matches
Integrated SAGE promotional catalog
How to price apparel with Mixed Decoration
How to price Direct To Garment printing
How to Price Color Changes
How to Price Digitizing
How to price Heat Transfers
Guide to apparel decoration pricing
What are Products?
Setting Your Shop Hourly Rate
Adding Your Own Products
Customizing the Base Products
Golden Products List by Global Region
Whats New
2025 Whats New
2024 Whats New
Wed, 06/05/2024 Tasks, notes, and assets associated with a quote to sales order to invoice will now be displayed in the Related Assets section. Pro & Express
Fri, 05/31/2024 Quick Tip: What does the yellow color indicate on a job board? Pro & Express
Thu, 05/30/2024 “Mastering Customer Proof Reviews: Unveiling the Dollar Value Flag” Feel free to use or modify it as needed! 😊📝 Pro & Express
Thu, 08/08/2024 Microsoft Outlook - Two Factor Authentication Pro & Express
Wed, 05/15/2024 Enhanced Notification System: In-app Alert for Proof Uploaded Pro & Express
Fri, 09/06/2024 Allow Line Item Taxable Override Pro & Express
Fri, 10/04/2024 New Apparel catalog available for US/CAN accounts! Pro & Express
Tue, 05/21/2024 Added New Email Template Tag: {{txn_downpayment}} Pro & Express
Wed, 06/05/2024 Added a new addition to the Products called 'Published'. Pro & Express
Mon, 09/16/2024 Express & Pro webinar articles Pro & Express
Tue, 10/08/2024 New feature added: Task templates to prefill repeated Tasks Pro & Express
Tue, 11/05/2024 2FA - Two Factor Authentication is now active (Optional) Pro & Express
Wed, 05/01/2024 Daily Tip - Add shopVOX email id's as contacts!
Tue, 10/29/2024 Enhancement to the online proofing feature. Pro & Express
Thu, 05/02/2024 Quick Tip: Within each user profile, there's a setting to toggle between Full Screen Mode and Fixed Layout.
Mon, 10/07/2024 Enhancement in Task Pro & Express
Sat, 08/10/2024 Australia/New Zealand regional Golden Products have been updated! Pro & Express
Wed, 08/28/2024 Update: The Purchase Order State will automatically change from Draft to Ordered once the Vendor Order ID is eneterd on the PO. Pro & Express
Fri, 05/31/2024 Added another PDF for Invoice Statements: Aging Summary PDF. Pro & Express
Wed, 08/28/2024 Enhancement in New Customer page Pro & Express
Fri, 05/17/2024 Job Board Overview and Best Practices Pro & Express
Wed, 11/06/2024 Colors: there is a new way to save colors! Pro & Express
Tue, 10/08/2024 New feature added: Task templates to prefill repeated Tasks Pro & Express
Wed, 10/16/2024 Announcement: Another new US Apparel catalog available! Pro & Express
- All Categories
- Setting Up Your Account
- Accounting
- Connecting Your QuickBooks Online account to shopVOX
Connecting Your QuickBooks Online account to shopVOX
 Updated
by Tyler MacDonald
Updated
by Tyler MacDonald
Connect shopVOX to QuickBooks to save you time by not having to recreate customers or transactions in QuickBooks. When you start to use shopVOX, anything that is customer-facing will always start in shopVOX and will then go to QuickBooks for accounting.
Connect to QuickBooks Online
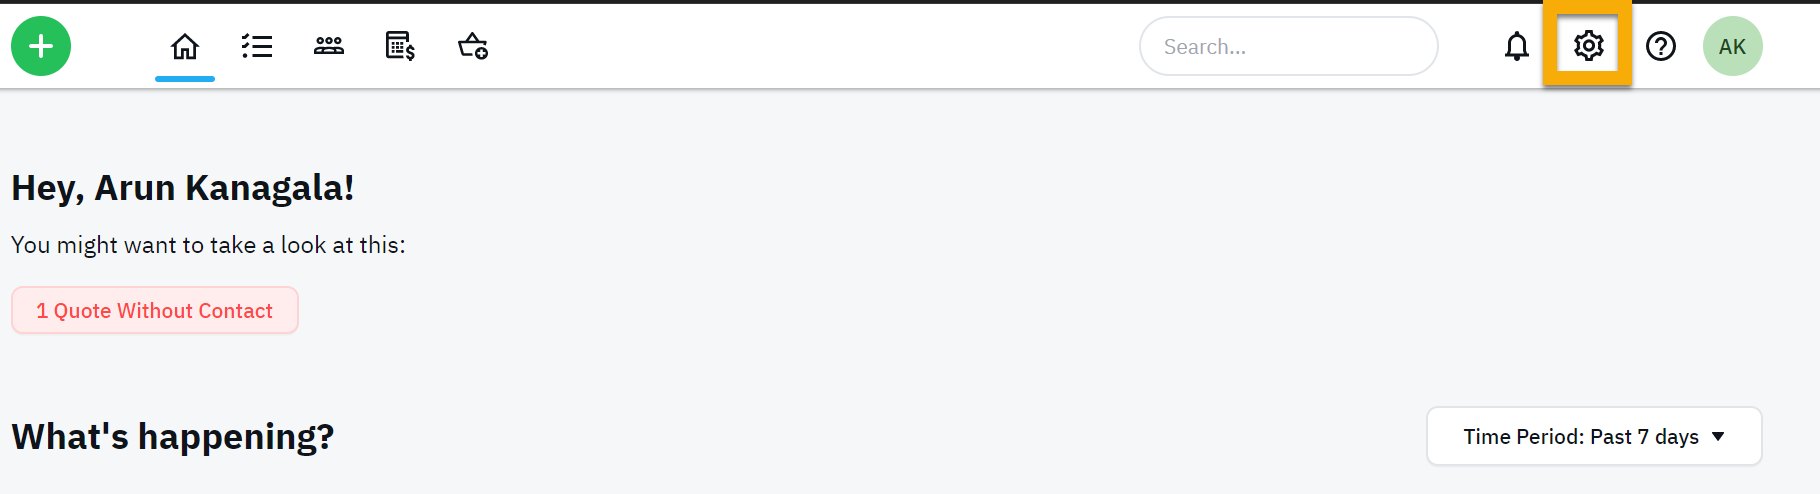
- Click on the Settings button from the top right corner of the screen.
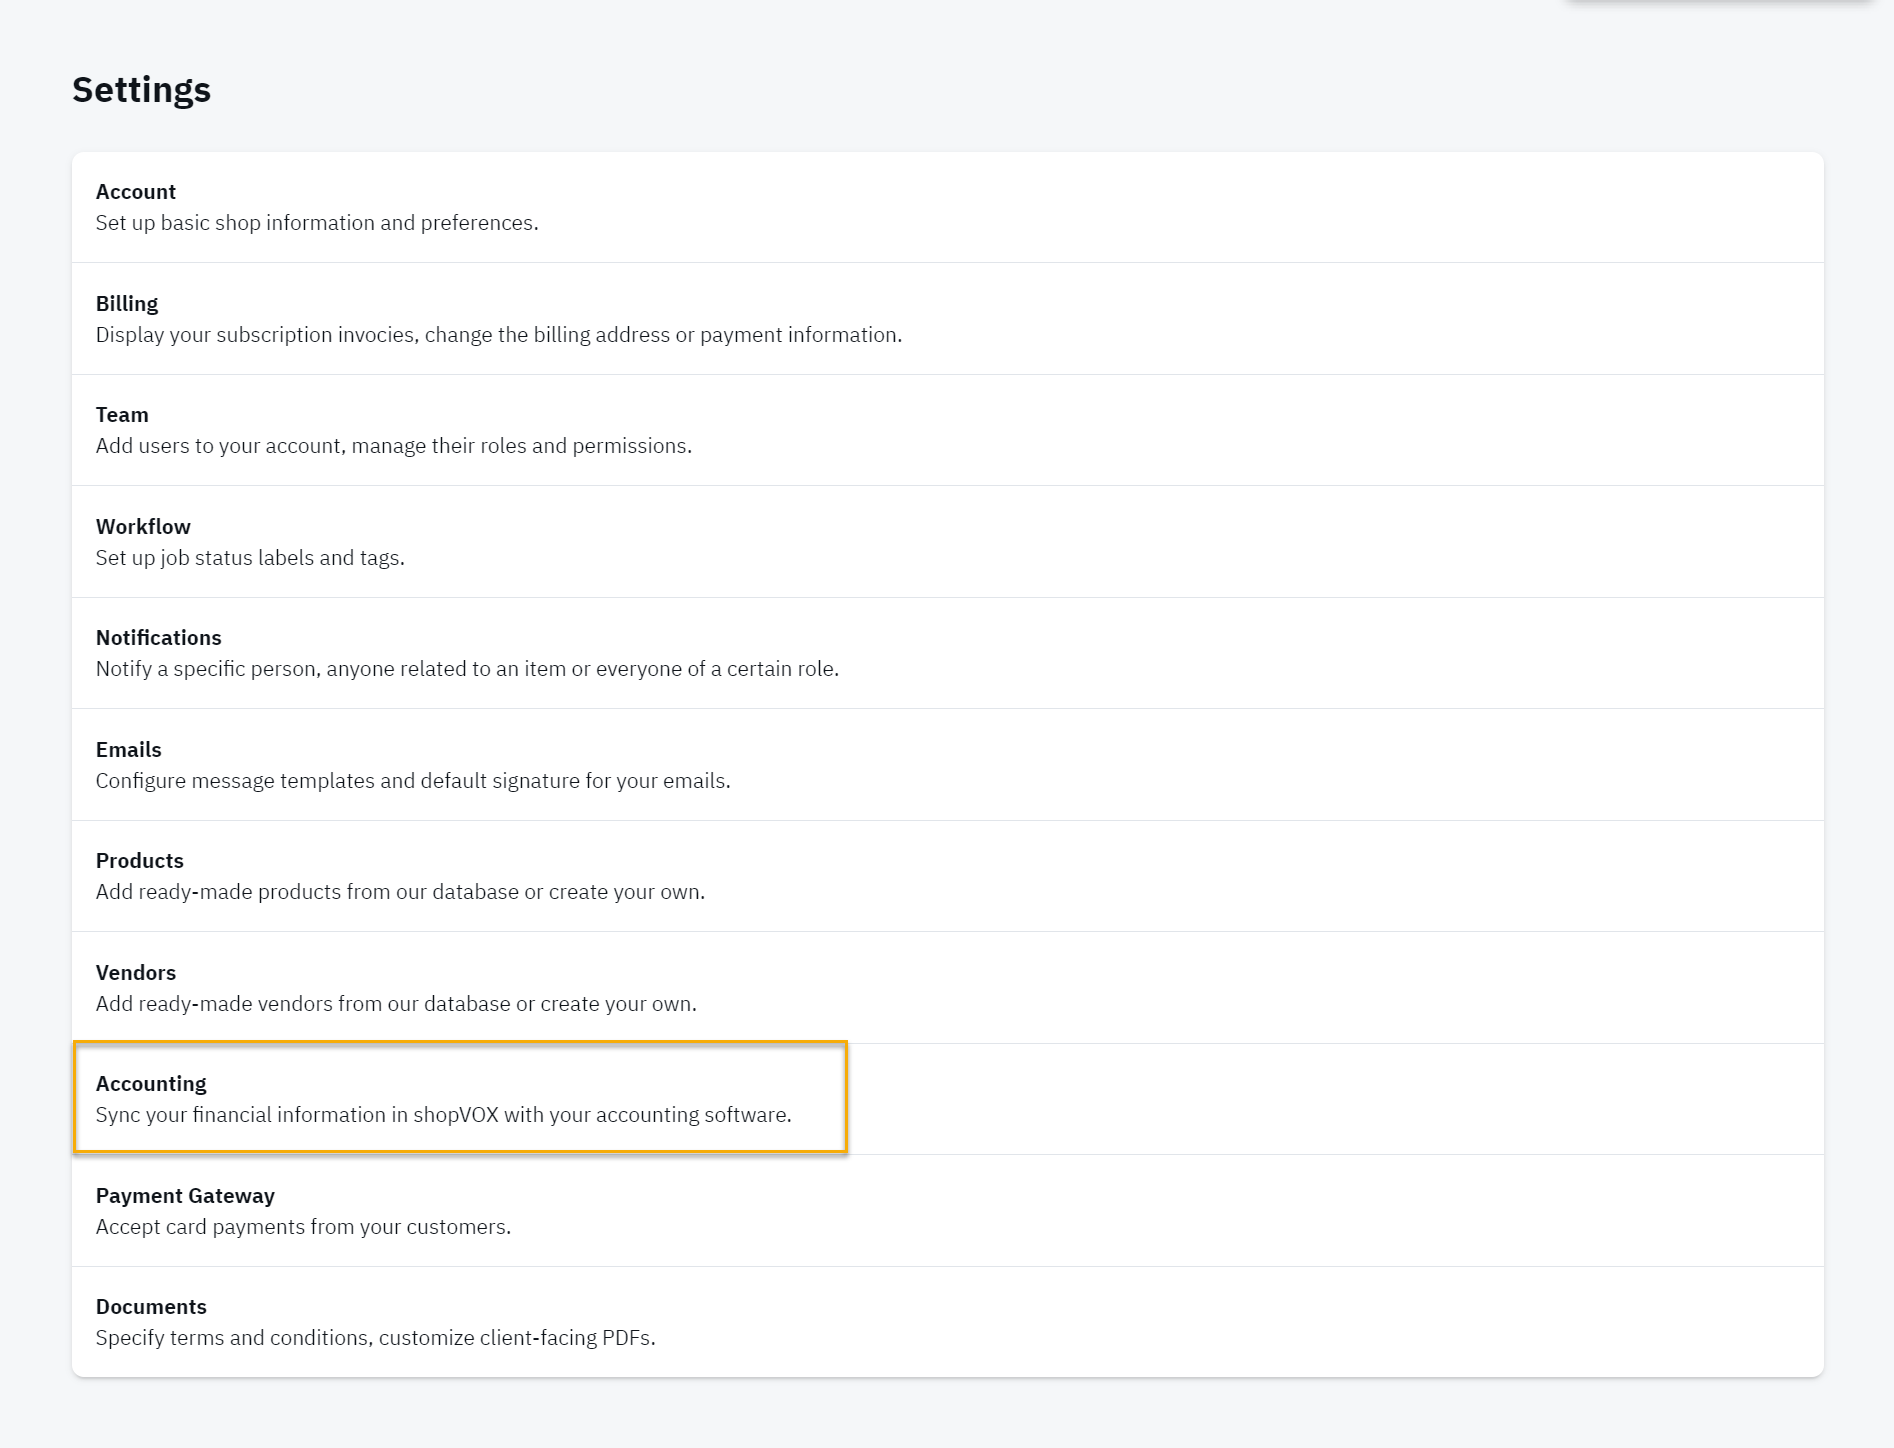
- You will see the list of settings > Click on Accounting.
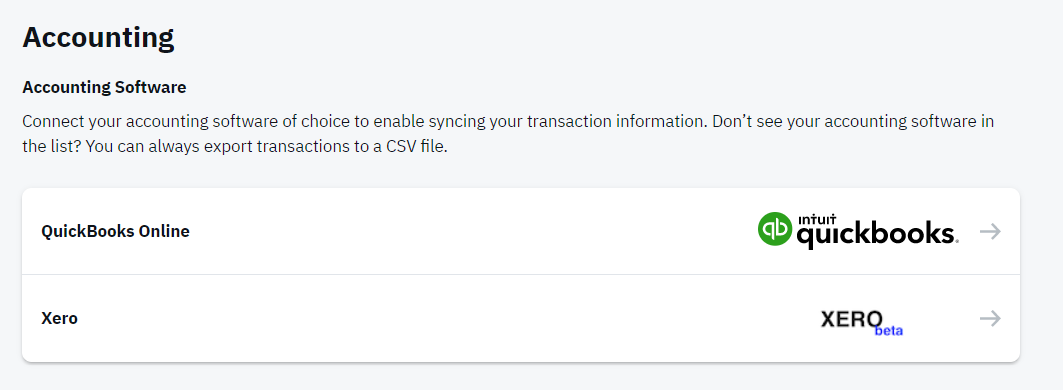
- Click on Quickbooks Online under the accounting section to establish connection.
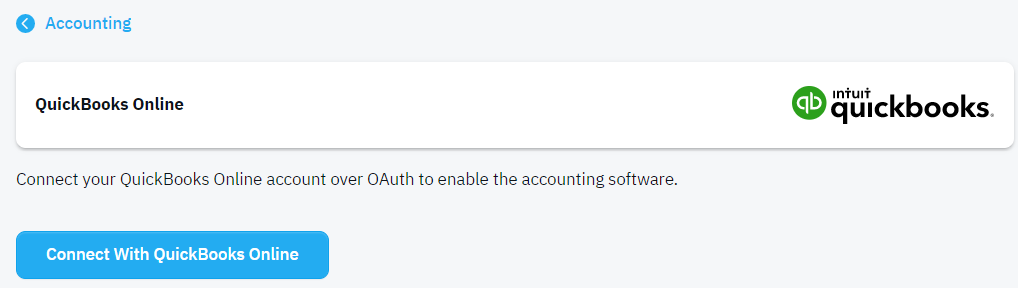
- If you aren't already logged into QuickBooks Online, you'll be prompted to enter your Username and Password for Quickbooks.
- You will see a green checkmark when Quickbooks Online is successfully connected. Now, shopVOX and Quickbooks are synced, there are a few more things we'll need to set up before we can start sending information to Quickbooks Online.

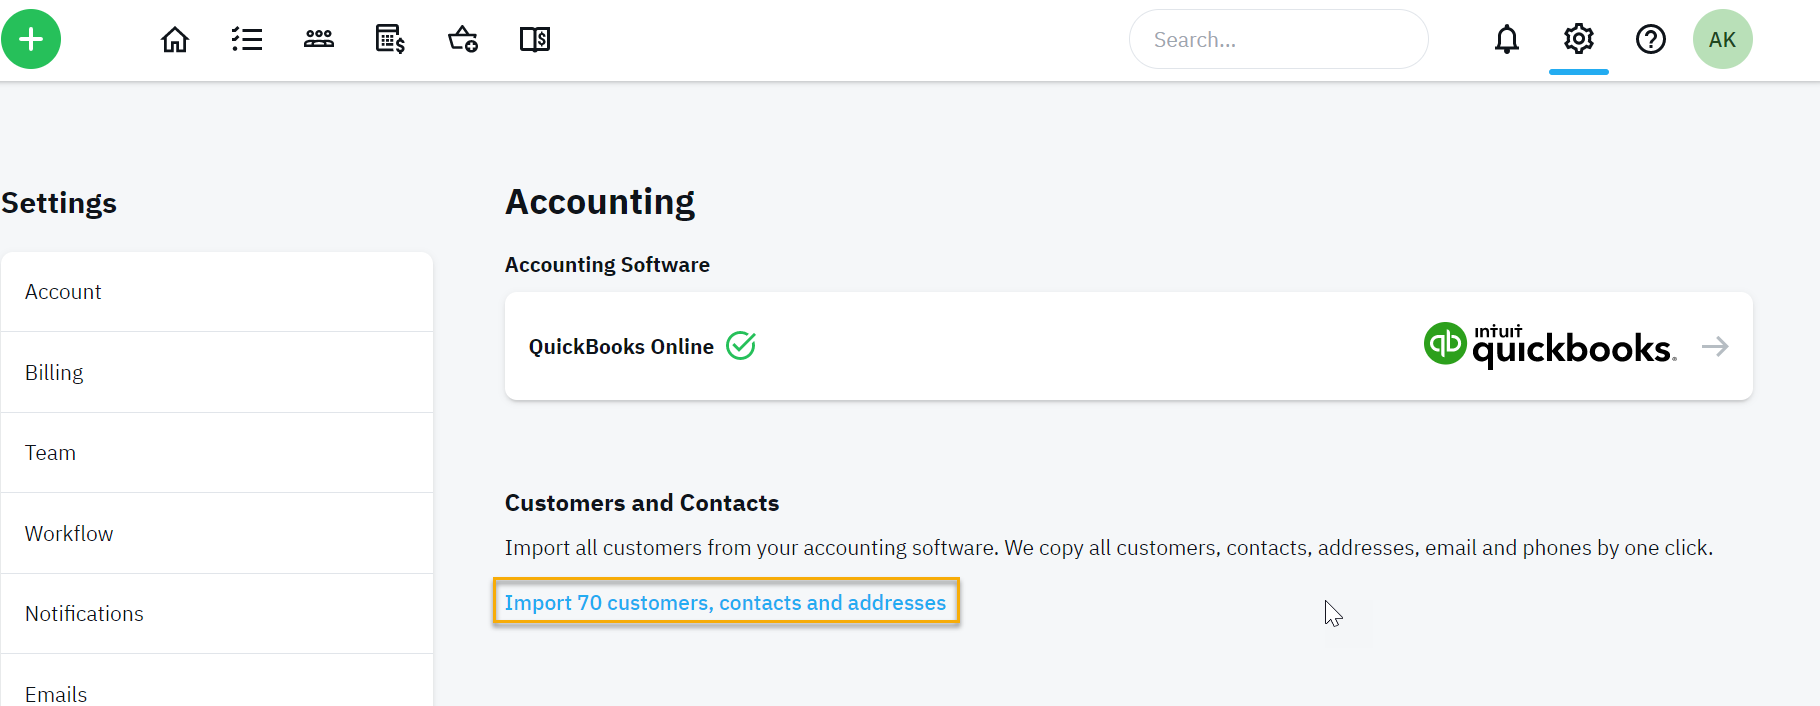
Import Customers and Contacts
You may copy all customers, contacts, addresses, email, and phone numbers from your Quickbooks Online without having to worry about adding customers manually in shopVOX. Click on "Import Customers, contacts and addresses
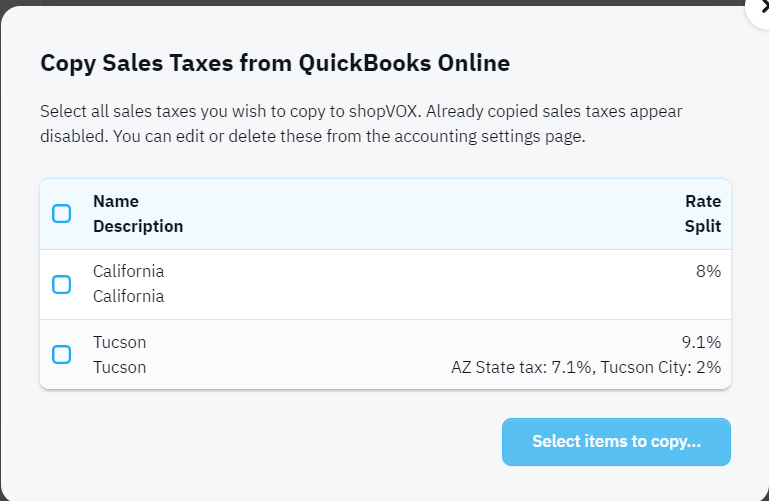
Quickbooks Items required to copy into shopVOX
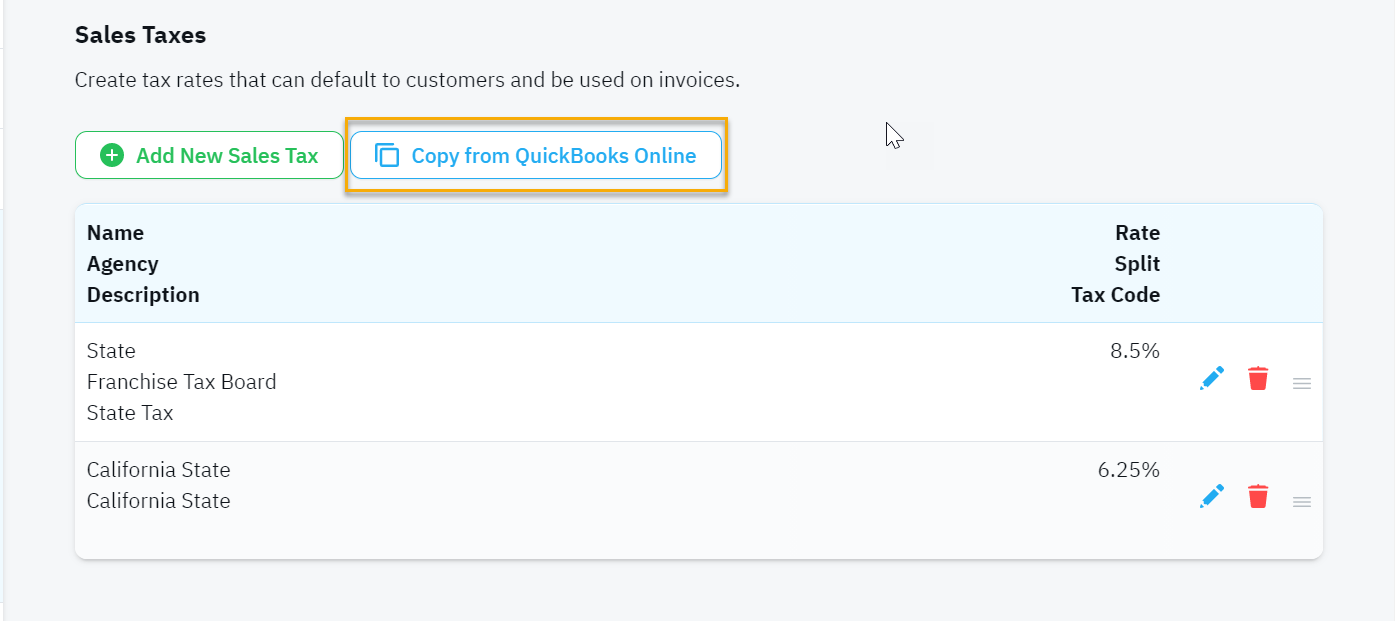
- Sales Taxes
- Term Codes
- Payment Methods
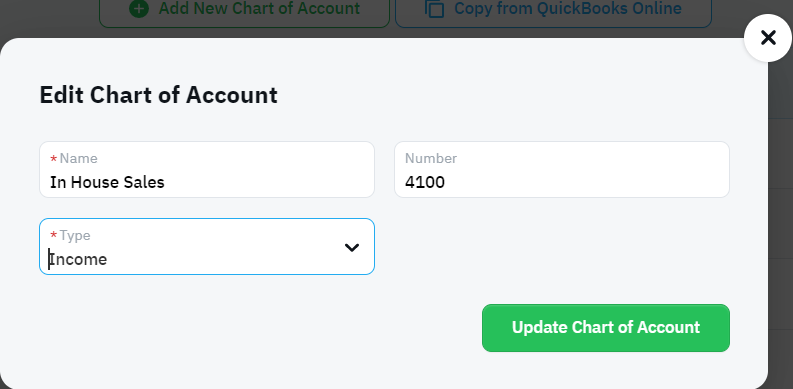
- Chart of Accounts
- Click on Copy from Quickbooks Online button which is available on all Quickbooks Items. Here is a screenshot of the sales tax item.
- Select the Quickbooks items you wish to copy into shopVOX on all of the four Items.
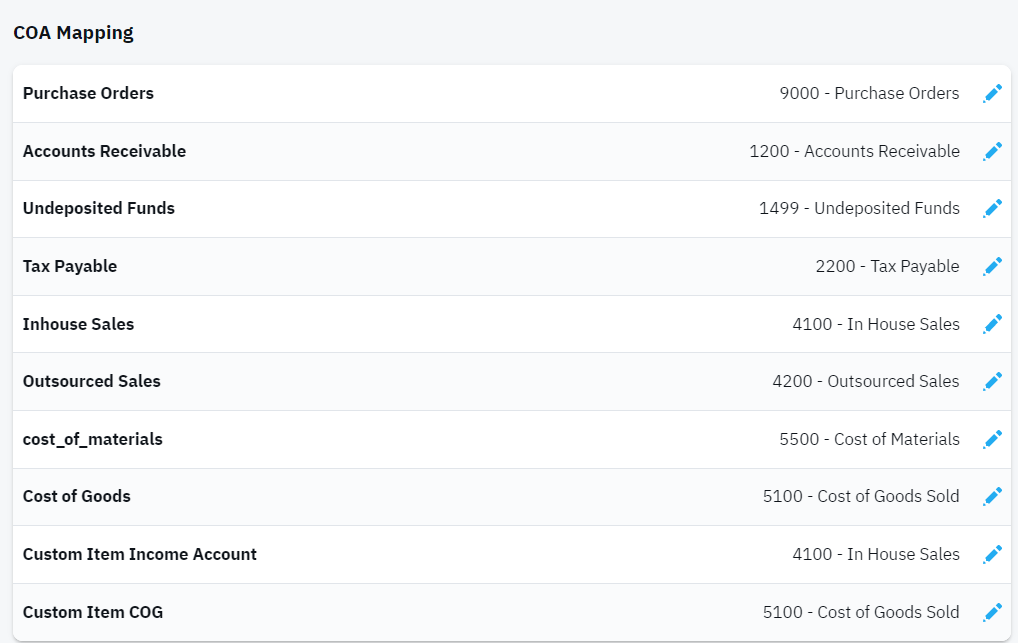
- After you copy the chart of accounts from your Quickbooks you will need to "map" them to the appropriate shopVOX Accounts. This tells shopVOX which of the QuickBooks chart of accounts it needs to use for each type of transaction in shopVOX. Click on the pencil icon to edit the COA Mapping and in each drop-down, select the QuickBooks account you want to use for each type of transaction.
- You are ready to sync your transaction information with Quickbooks Online.
Test Sync to Quickbooks
Click on the "Post to Accounting" tab and select an invoice to sync to Quickbooks.
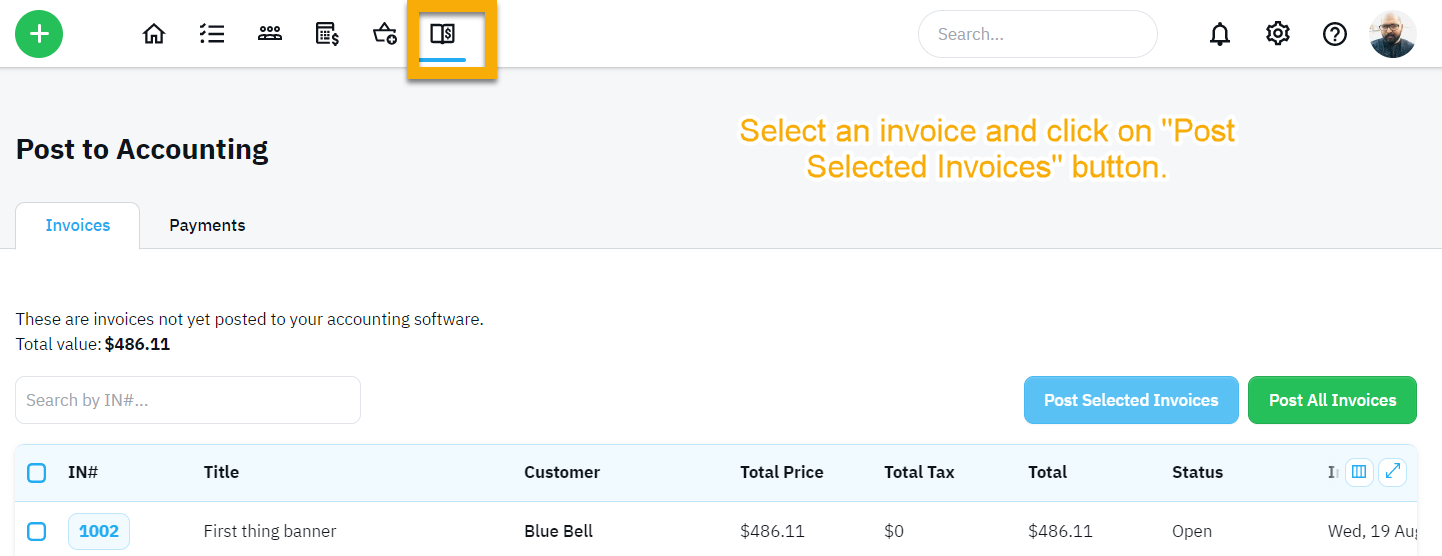
You are now ready to sync invoices and payments to Quickbooks. It is recommended to sync at least once a week.
