Table of Contents
A Guide to Creating Your First Order
 Updated
by Aaron Aldrich
Updated
by Aaron Aldrich
Your new shopVOX account is set up and you want to hit the ground running! I'm loving your enthusiasm! So, where do you need to go to get started? We will walk through the basics of creating a quote, adding a line item, converting to an order, sending your job to production and finalizing the order as an invoice. Sounds like a lot, but we've made it simple!
Creating the Quote
Quoting is the first step you take to provide your customer with the details and pricing of their request for their approval before the order is actually considered sold.
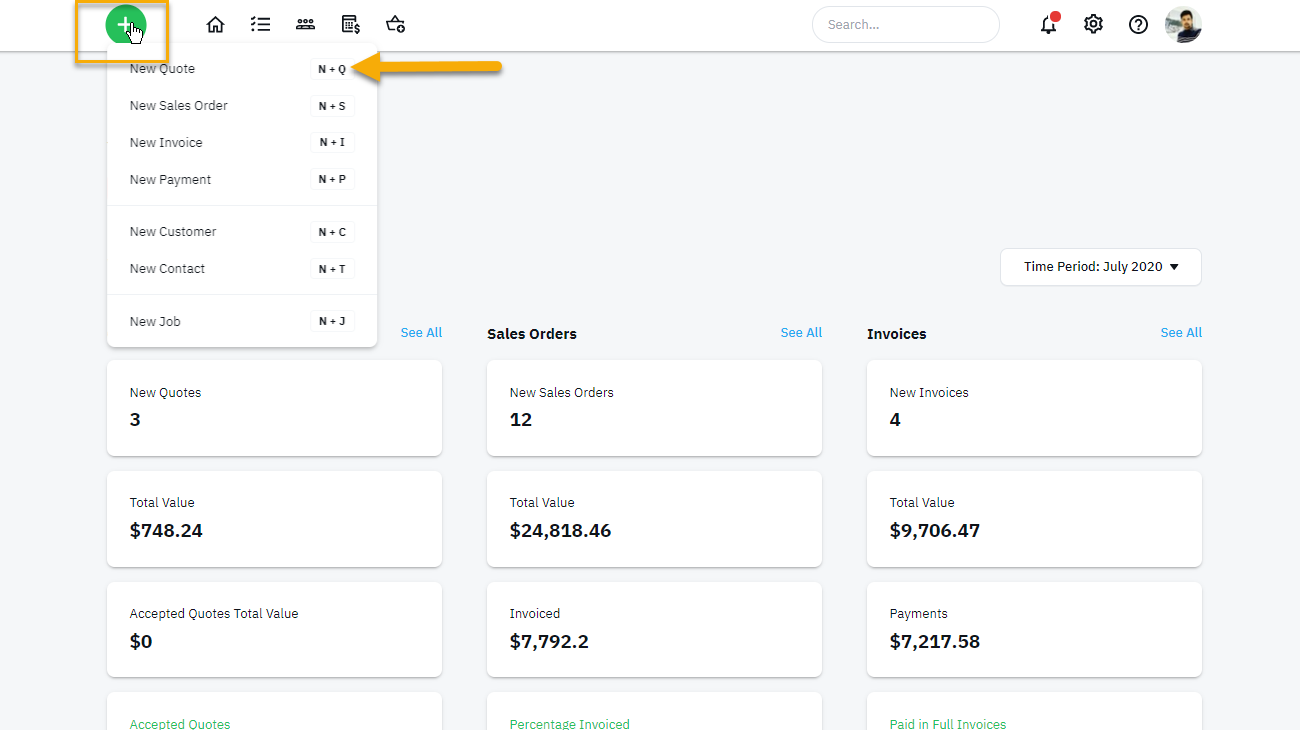
- Click the green Quick Start button at the top left of your screen to start any new forms like quotes, sales orders, invoices, customers and contacts. From here you will choose New Quote. If your customer has already approved pricing and is ready to place the order, you might consider starting with a New Sales Order instead.
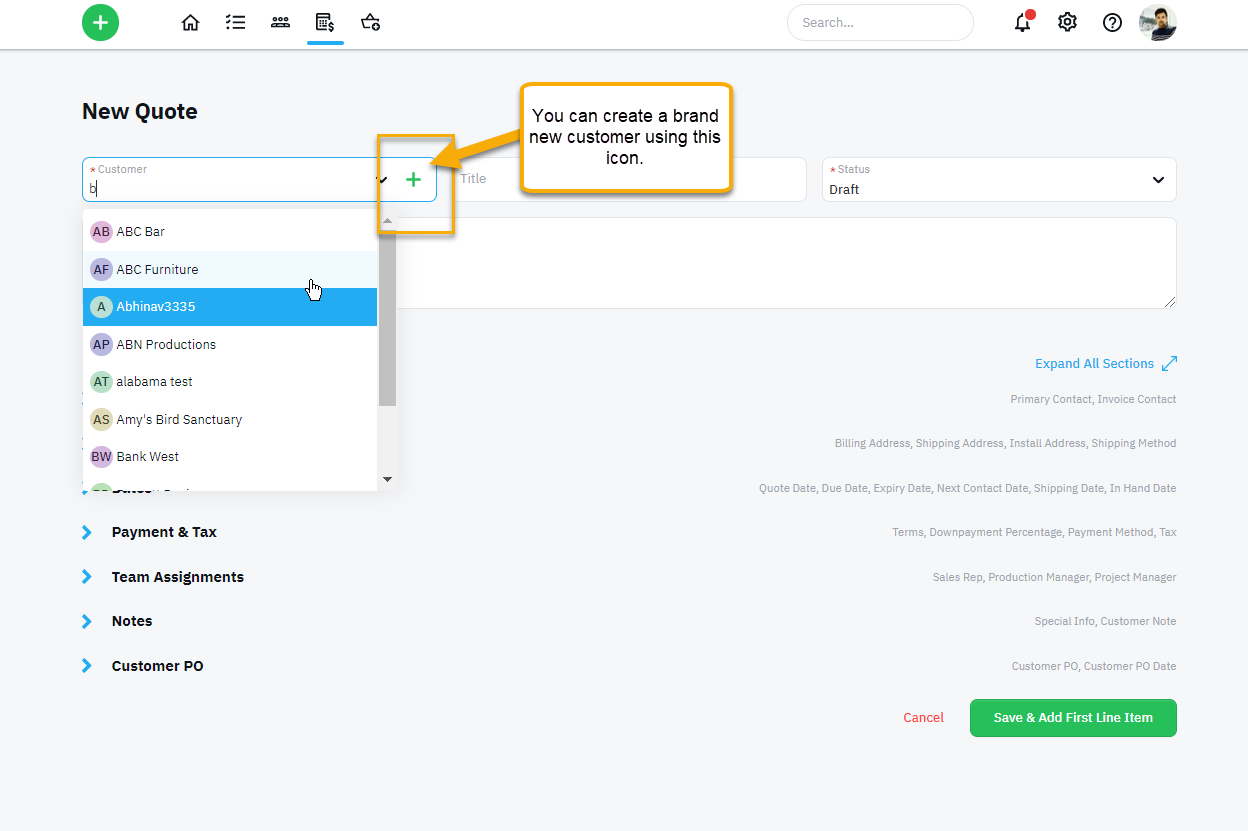
- Once the new quote form has loaded, you can start filling out the details. Select a customer from your imported customer list simply by typing the customer's name in the customer field. Or add a new customer by clicking the Plus icon next to the customer field. Next, add a title and fill out any additional sections. FYI - you can also edit the additional options later if you like. Click the green Save & Add First Line Item button when you are done.
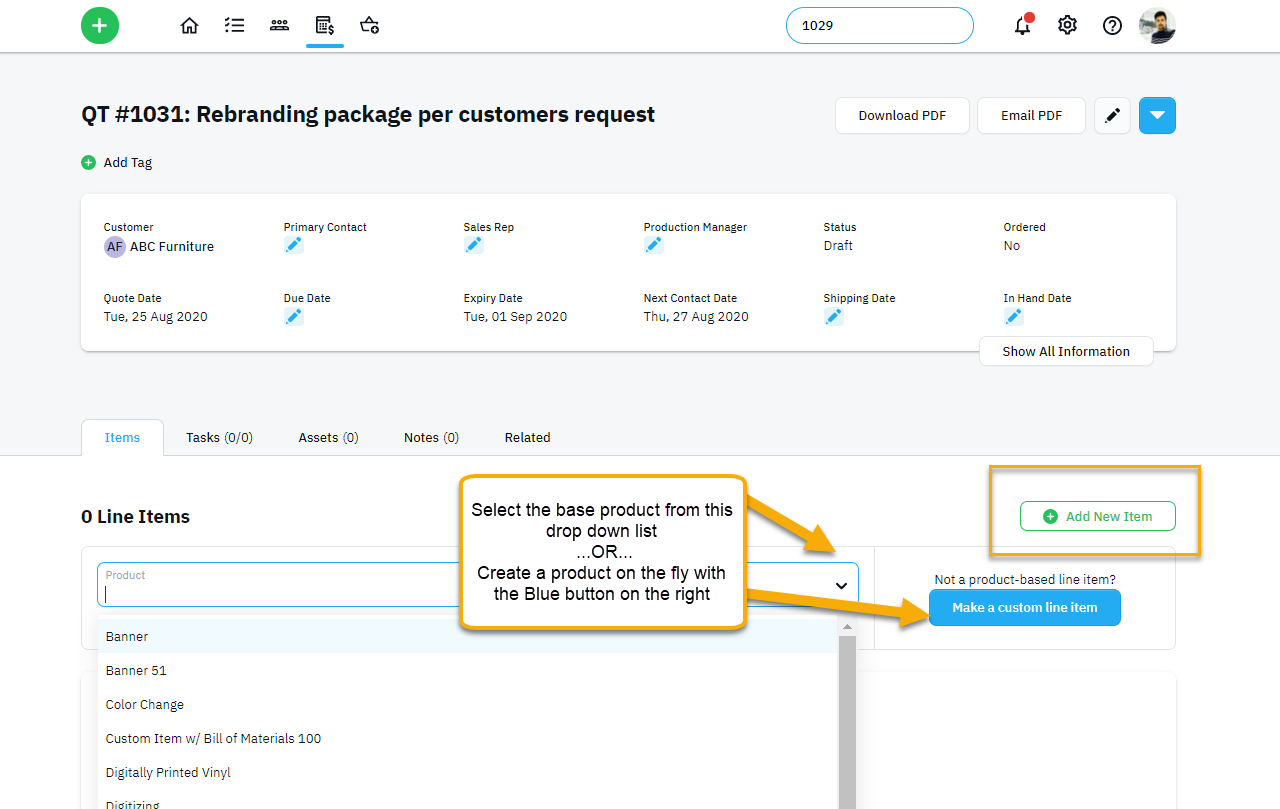
- Click the Add New Item button to get started. You can choose from our base products or write in a custom one if you like.
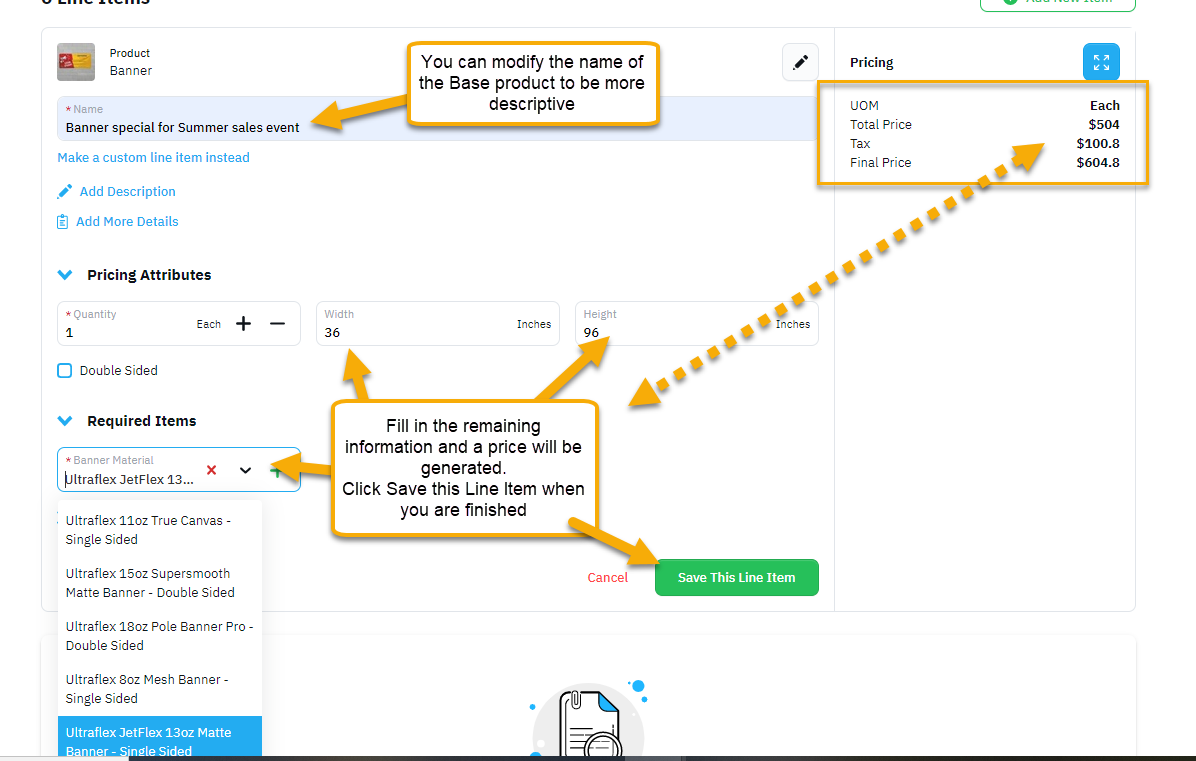
- Once you have selected your product, you have the ability to rename the product to be more specific. Fill out the remaining fields and a price will be generated. Click Save This Line Item when you are done.
NOTE: For more information on how products work click here. To see a specific breakdown of each pre-made base product and how they work, please refer to the Help center in the Products and Pricing section.
- Deliver the Quote! - You can now email or print out the Quote to deliver to the customer. If you need to add additional Line items, just repeat the steps above to add them.
Delivering the Quote
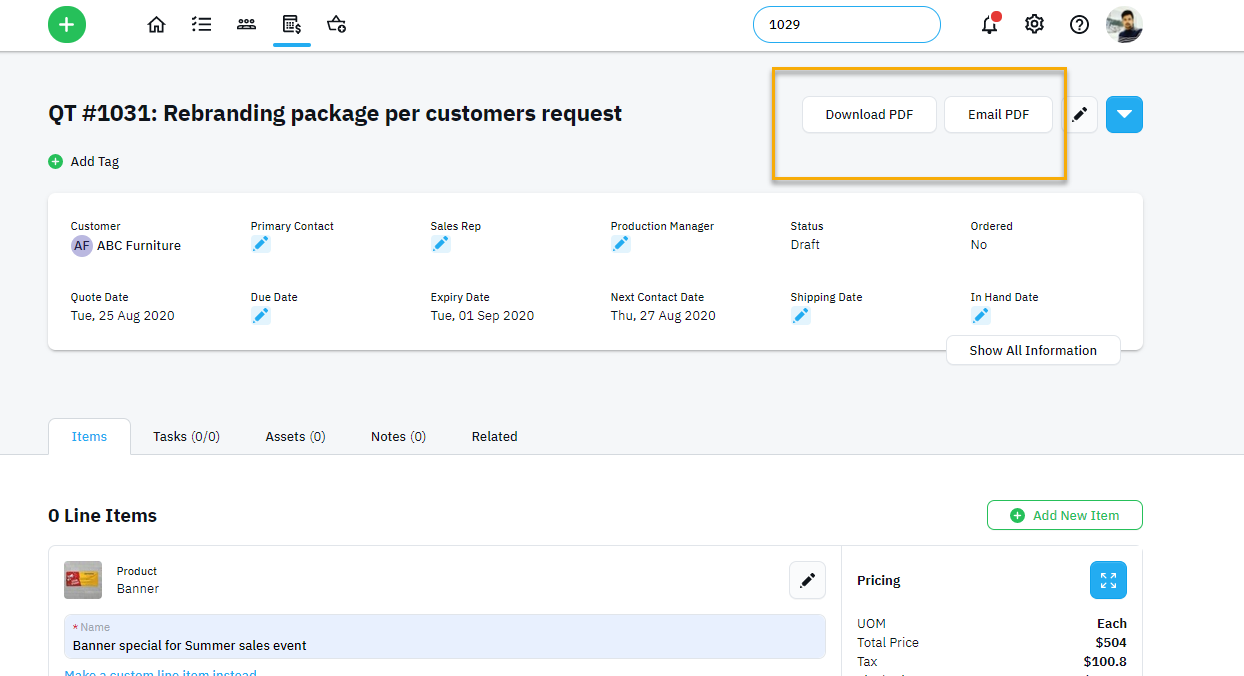
Once you have added all the items that the customer has asked for, you can now print out a PDF and deliver it to them in person or email the Quote directly from shopVOX.
To email: Click on the Email PDF button at the top of the transaction page.
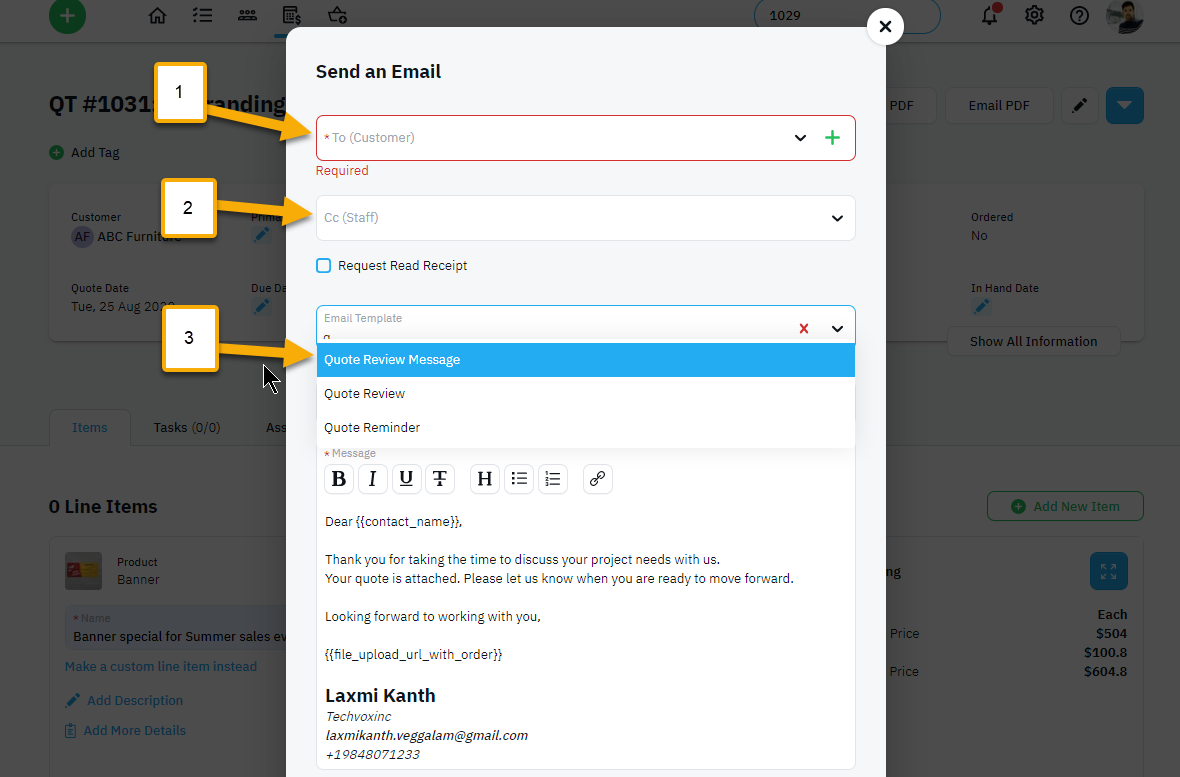
- Select the recipient or click the green plus sign to add a new contact.
- Option: you can cc someone else in the account
- Select a pre-made email template or just start filling out the subject and body as you would on your email platform.
Converting to a Sales Order and Recording a Payment
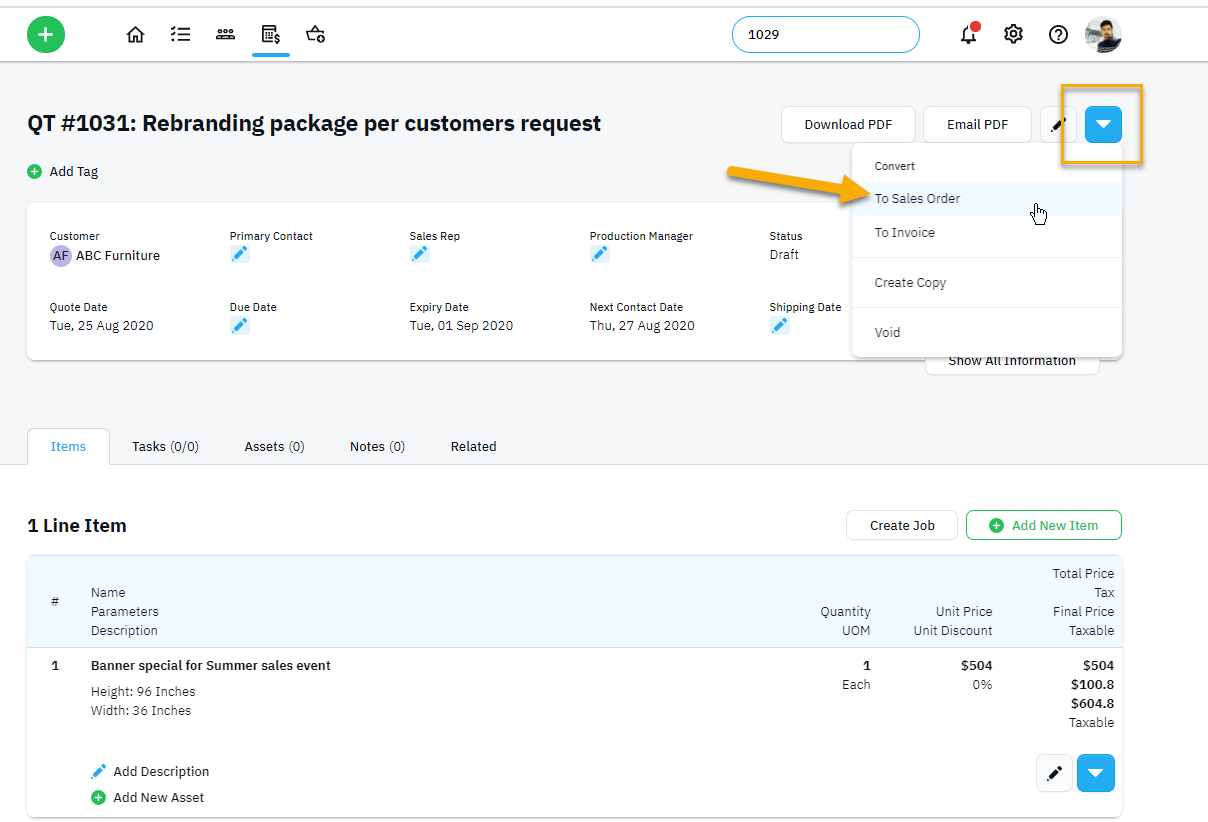
The sales order is the stage after the quote is approved and we can start sending jobs to your job board, tracking production and more importantly; get paid!
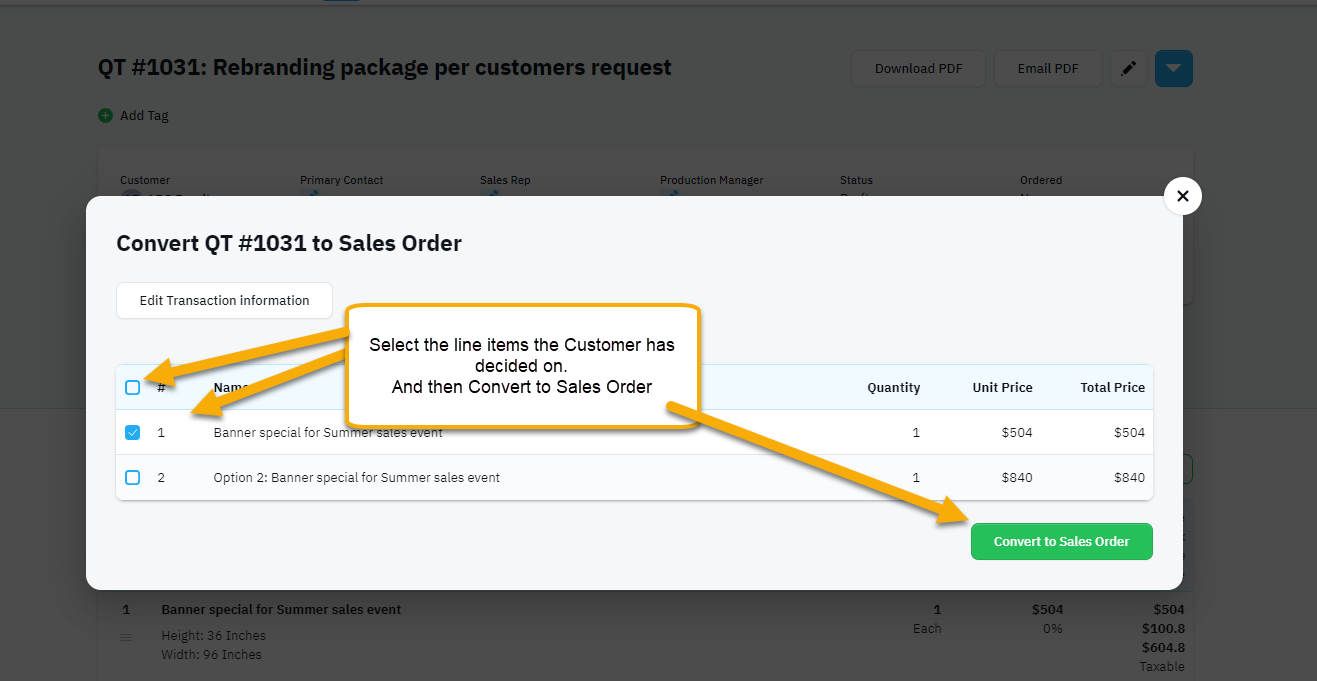
- Click the blue Action Icon and select Convert to Sales Order. Then select the line items that the customer has approved and wishes to proceed with on the order, and finally select the green Convert to Sales Order button at the bottom of the screen.
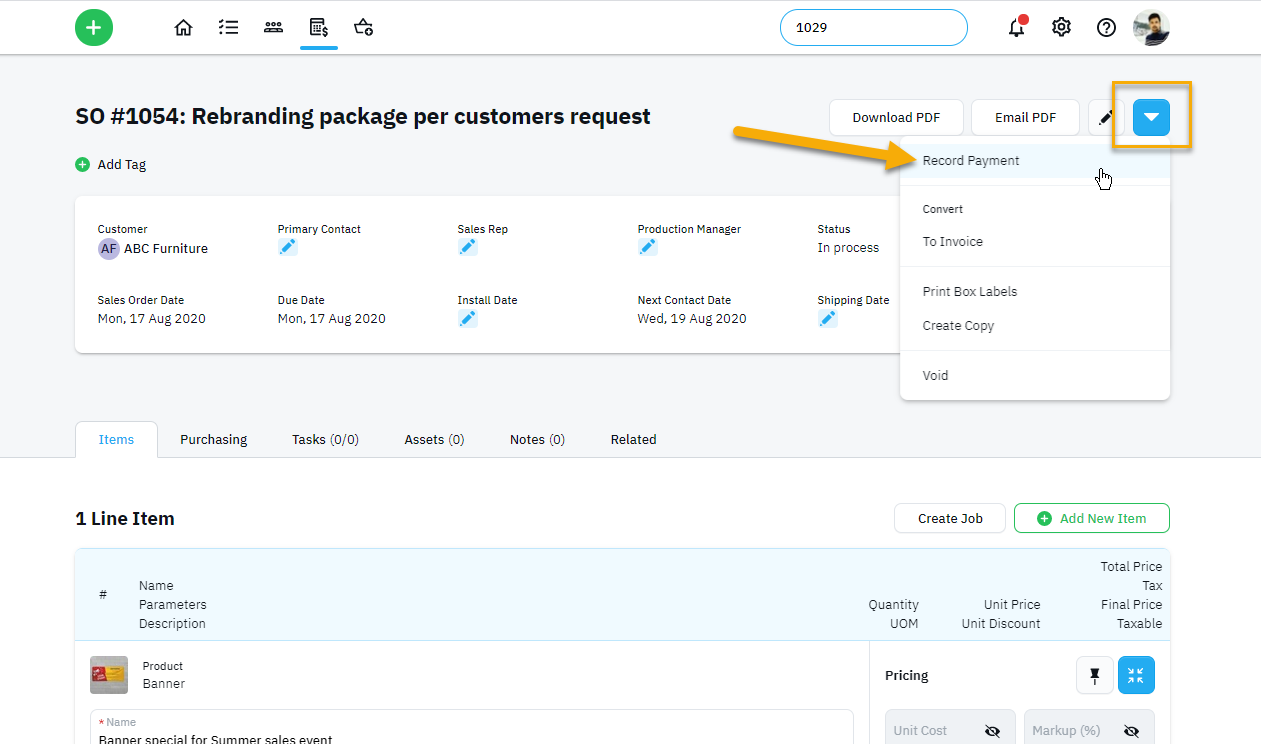
- Now that you have a new sales order, you can move forward with applying a down payment to the Sales Order by choosing Record a Payment from the blue Action Icon
Creating the Job and Adding a Proof
Once you convert the quote into a sales order and applied your down payment, we're ready to send your job to the job board and start tracking production. You have the ability to add a proof and the customer can approve this online. Below is a brief explanation of the process. For more information on the Online proofing process review this article - Uploading and sending Proofs for approval
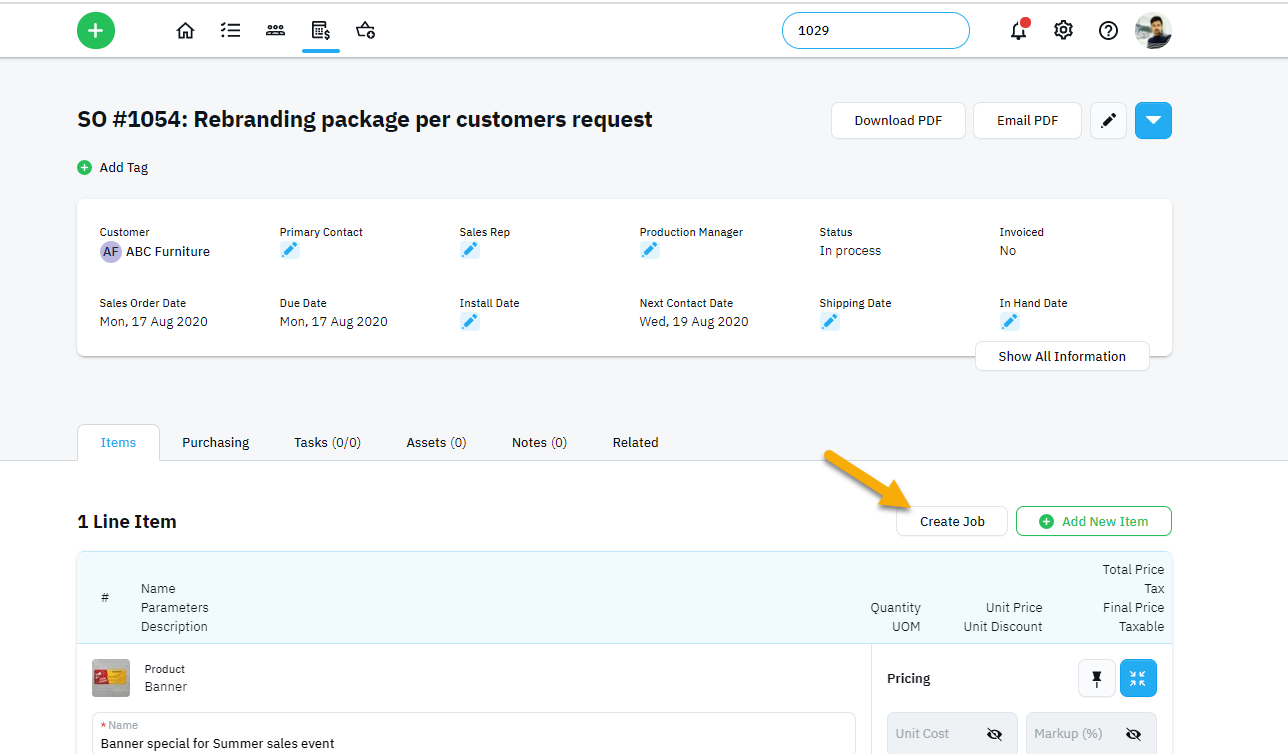
- Create a job on the job board using the Create Job button on each line item. This starts the process of tracking the production of the order.
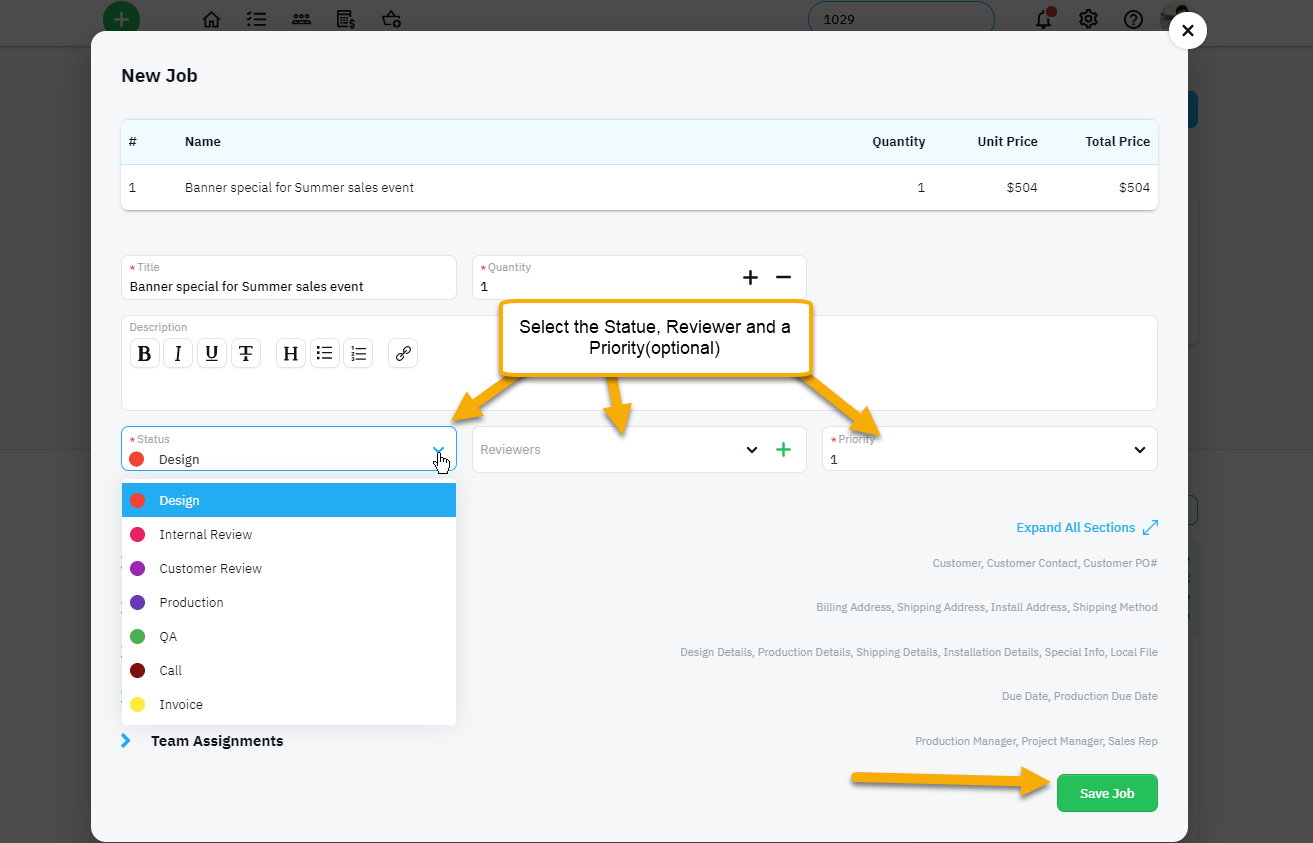
- Select the status to show what status this job will be labeled on the job board and pick a proof reviewer. You can also select a priority, which is optional. Click Save job button and this will now be launched on the job board and the production process can be tracked. Check out our tutorial on job statuses here - Track Progress with Job Statuses
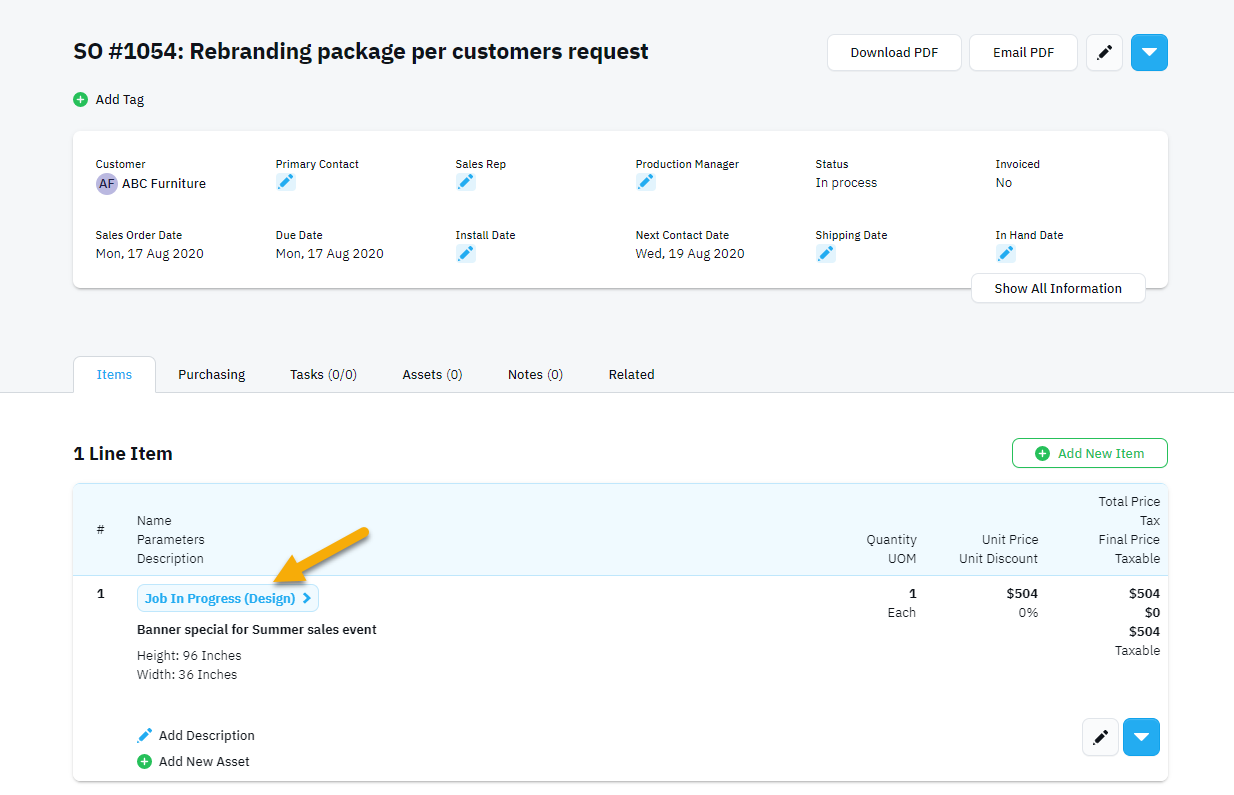
- On the Sales Order, you can access the job by clicking on the Job in Progress button. From here, you can add a proof.
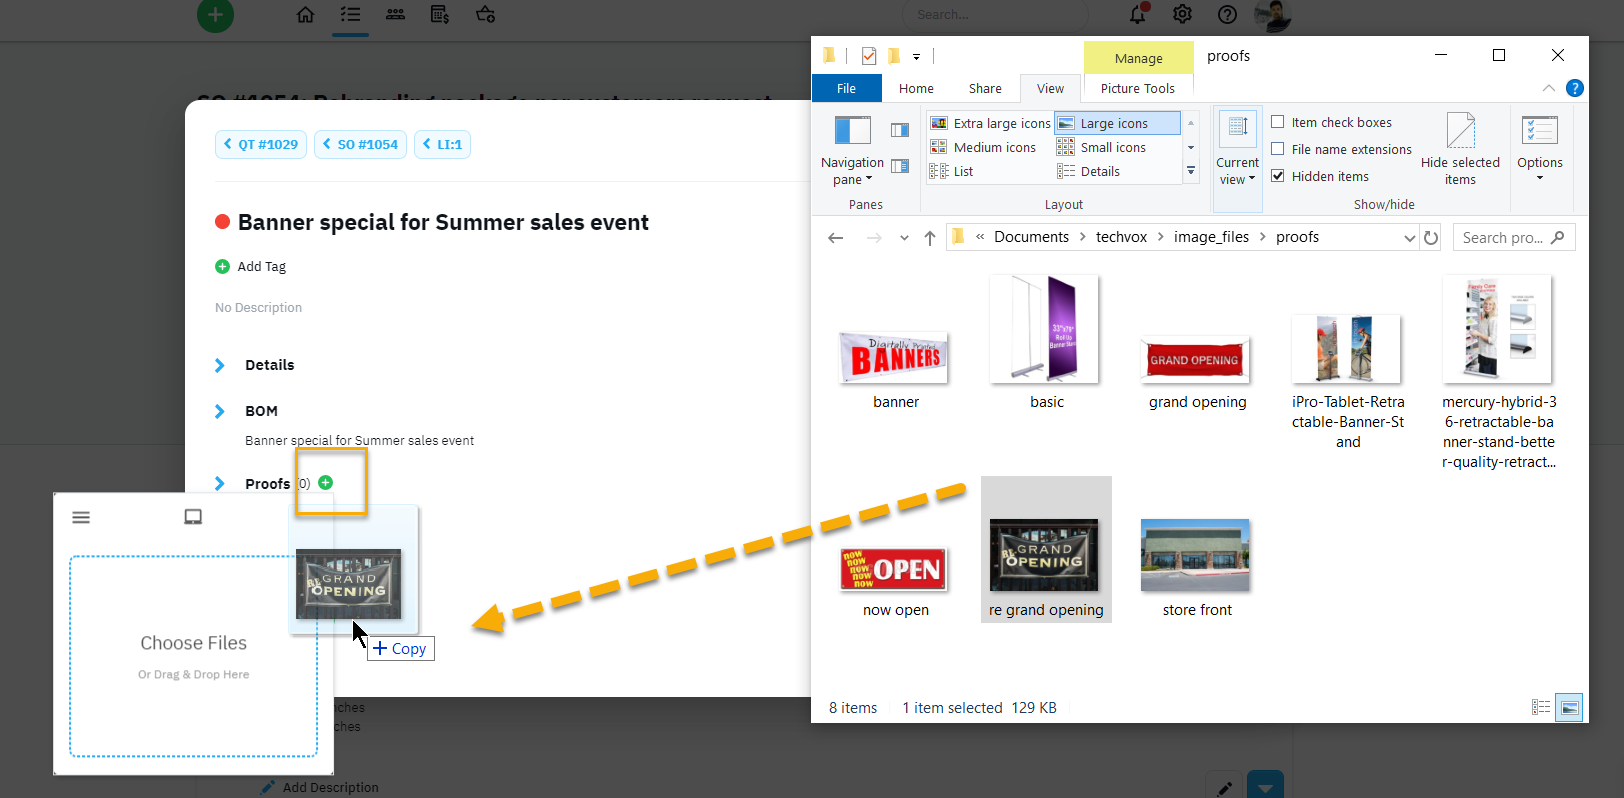
- Adding the proof can be done by clicking the Green plus icon next to Proofs. The proof can be uploaded or simply drag and drop the image from your file manager.
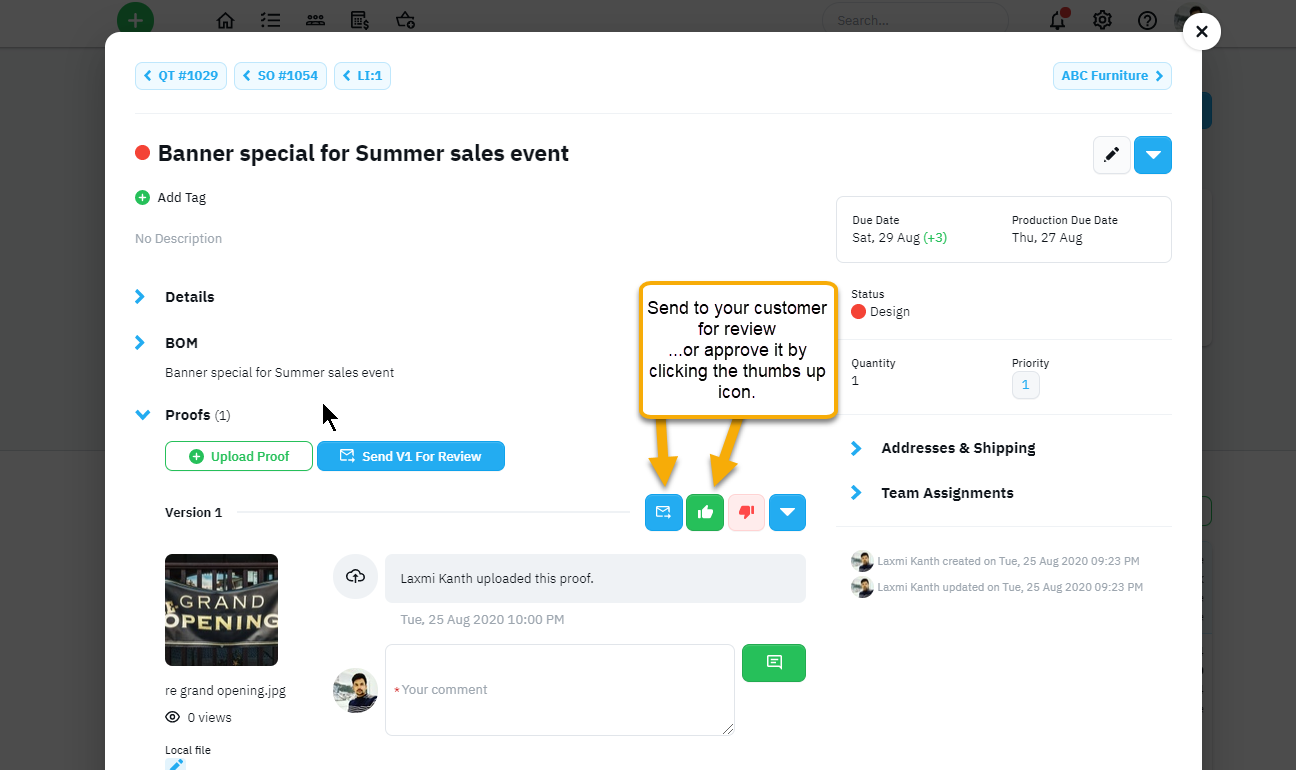
- After the image is uploaded, click on the proof and it can be sent to your customer for review and approval.
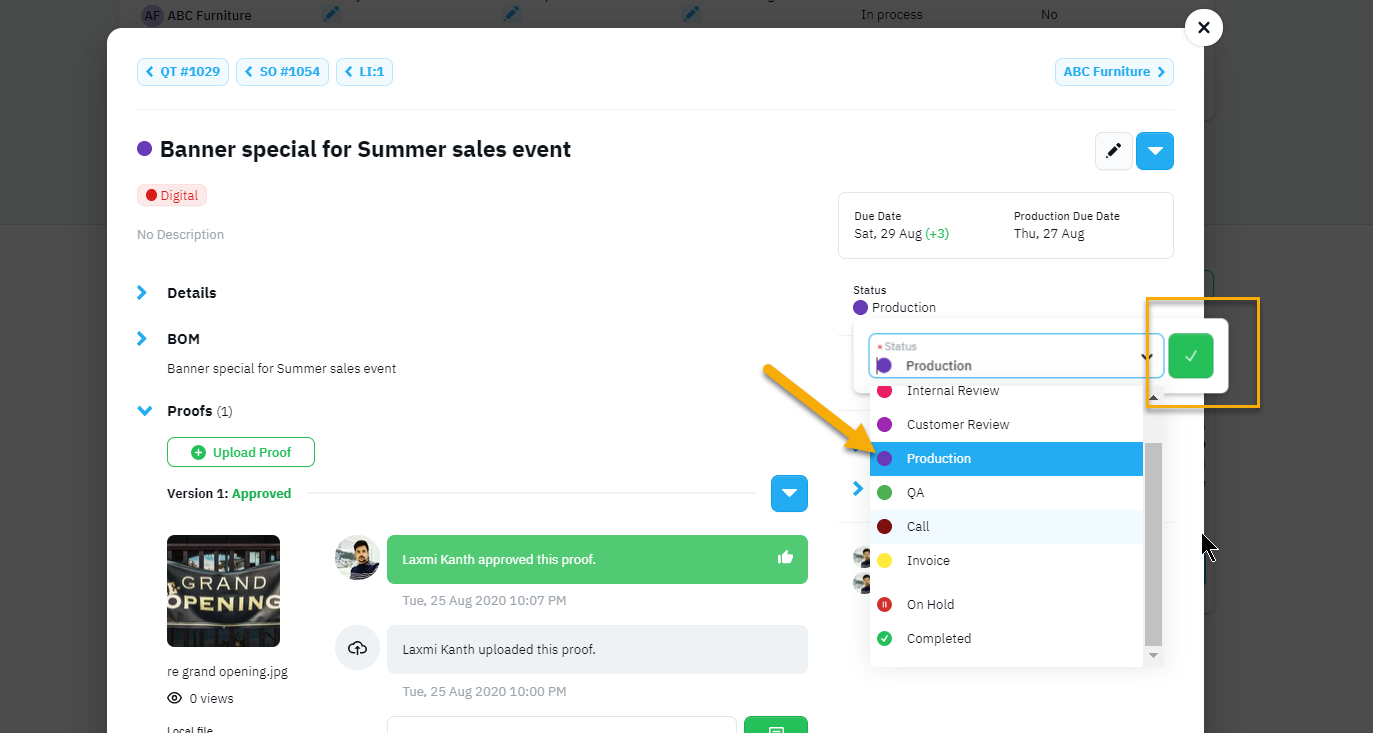
- As the Job progresses, the status of the job can be changed to reflect where it is in your production process. This will update on the job board and you will have a full picture of all work and their respective statuses. This status will change until it is completed. It can then be converted to an invoice.
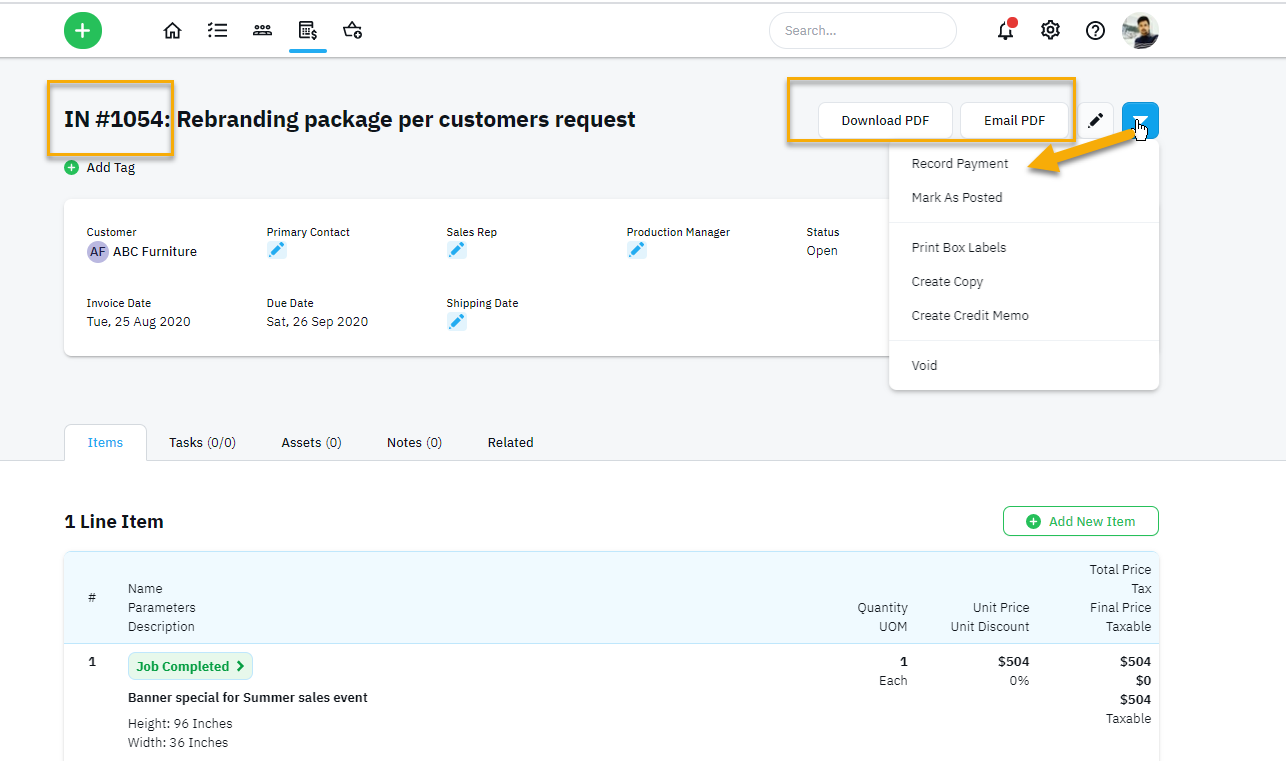
Converting to an Invoice
Now that the production is complete and your order is ready for your customer; we can convert the transaction to its final stage... the invoice.
- From the Sales Order page, click on the blue Action Icon and select Convert to Invoice.
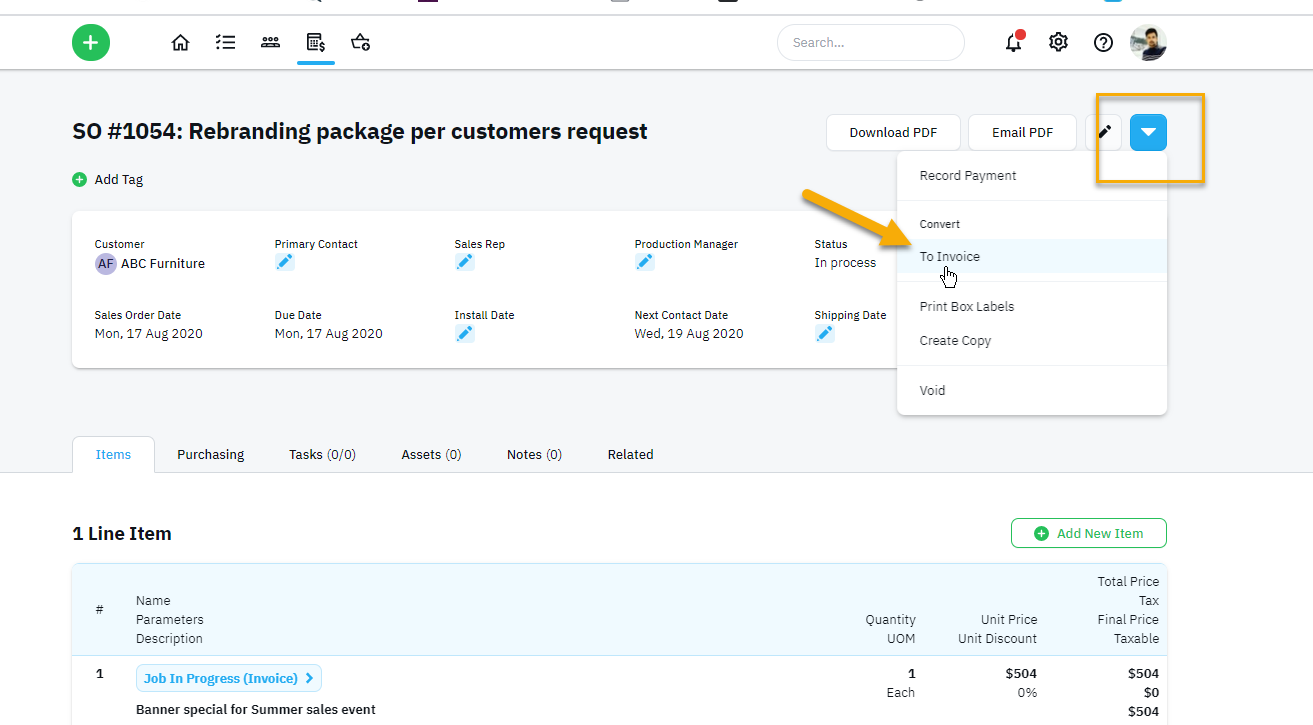
- The transaction will change from an SO to an IN. Several things happen when it is converted to an invoice.
- An Invoice PDF can be printed or emailed to your customer
- The final payment can be applied
- The invoice is ready to be synced to your accounting software. Follow the steps on posting your invoices to your accounting software here -
And, that's it!
You have an complete all of the steps from star to finish - easy peasy! Now you have the "know-how" to manage quoting, production tracking and invoicing all within shopVOX.
